End of season maintenance of garden

end of season maintenance of garden

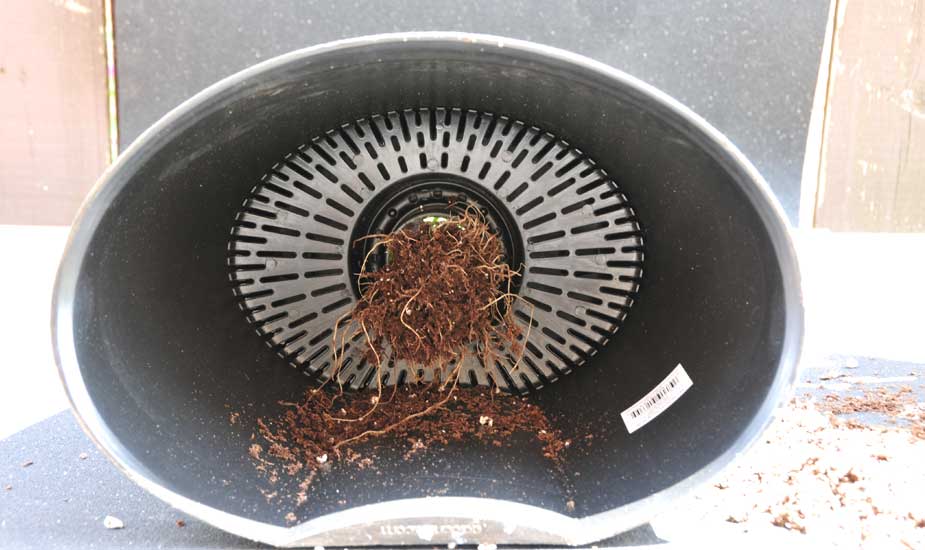
At the end of the gardening season, discard the entire contents of each container or add them to the compost pile. More often than not, the growing mix is not suitable for reuse the following season as it is deprived of all nutrients and plant roots present in the mix need time to decompose. In addition, you do not want to run the risk of spreading diseases that may be present in the mix, so it is usually best to start with a fresh batch.

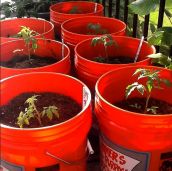
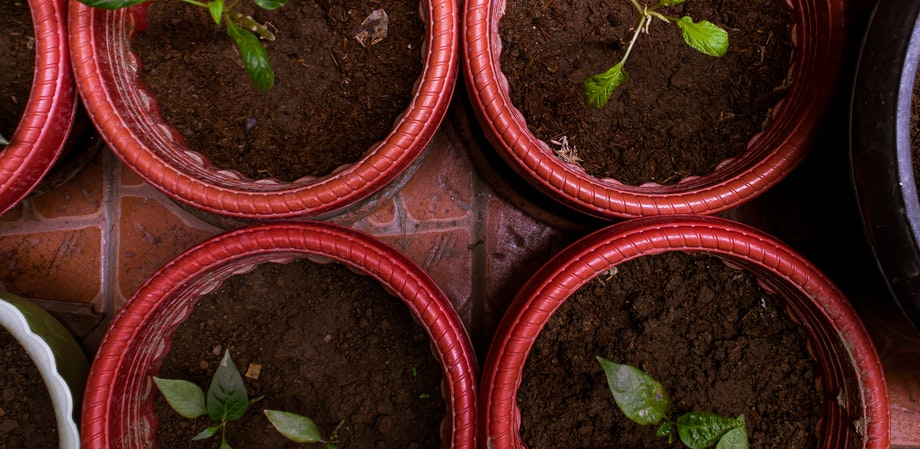
Wash each container to remove any fertilizer salts and disinfect it with a 10 percent chlorine bleach solution if needed. Non-porous containers (plastic) may be left outside over the winter. Porous containers retain moisture and should be brought inside to prevent them from freezing and cracking. Now is also a good time to inspect your containers and perform any necessary maintenance.

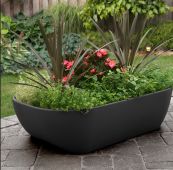
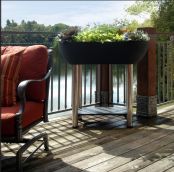
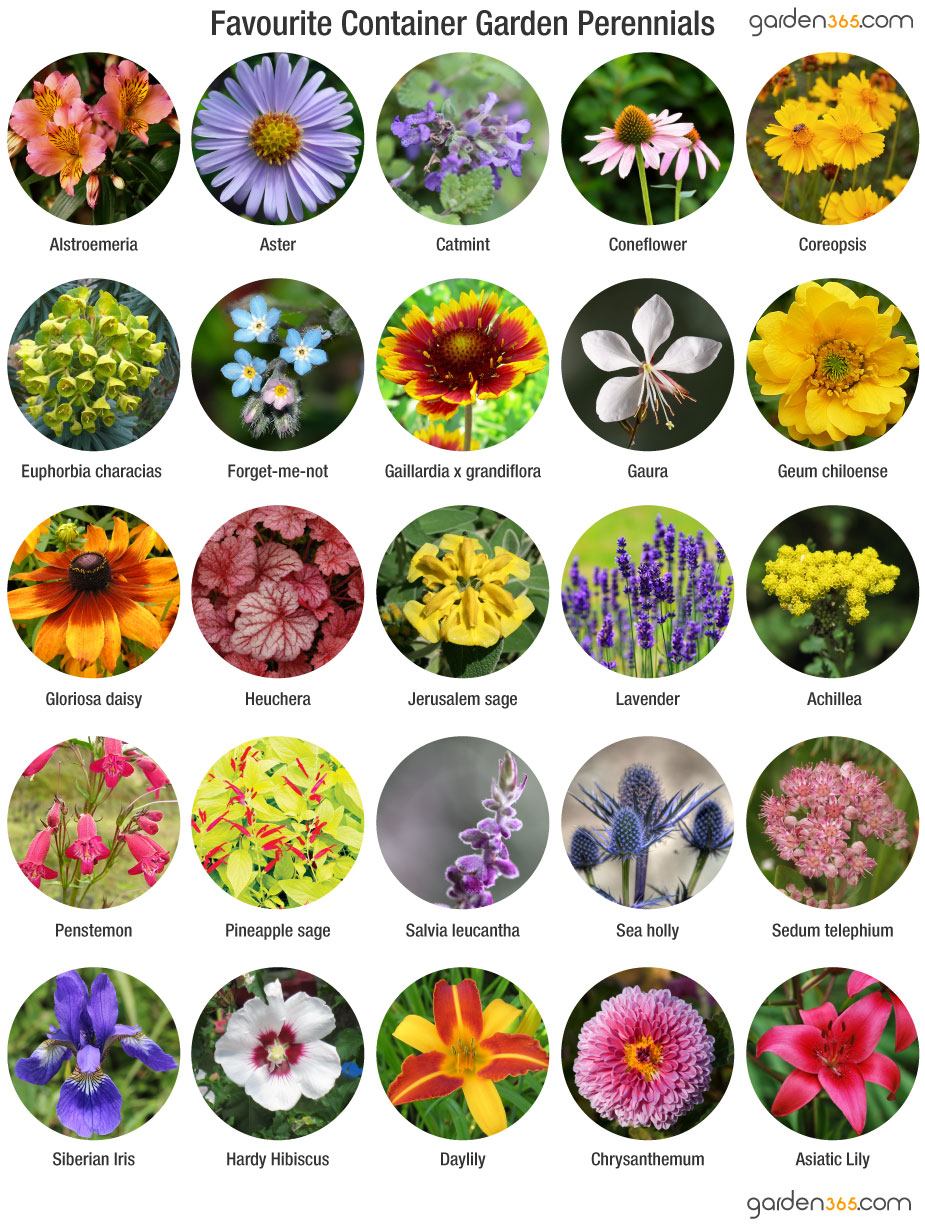
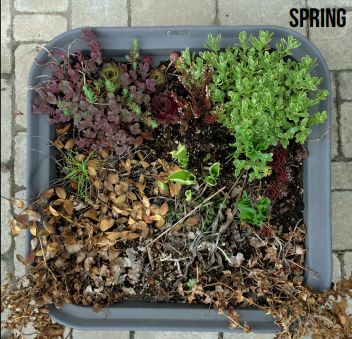
If your container garden is planted with perennials and you want to leave it outdoors over the winter months, extra care must be taken to protect your plants. Container-grown garden plants are more susceptible to freezing and must be protected from the cold; how much protection is required depends on just how cold your area gets (see the Plant Hardiness map). Snow will generally offer some insulation but mulching with leaf mold or straw works well too. Using wind screens or burying the container in the ground is also very effective. Some experimentation may be required to find the optimal solution for your climate but it is well worth the effort and will end up saving you money over time.

End of season maintenance fall
End of season maintenance spring

Vegetable Growing Sheet
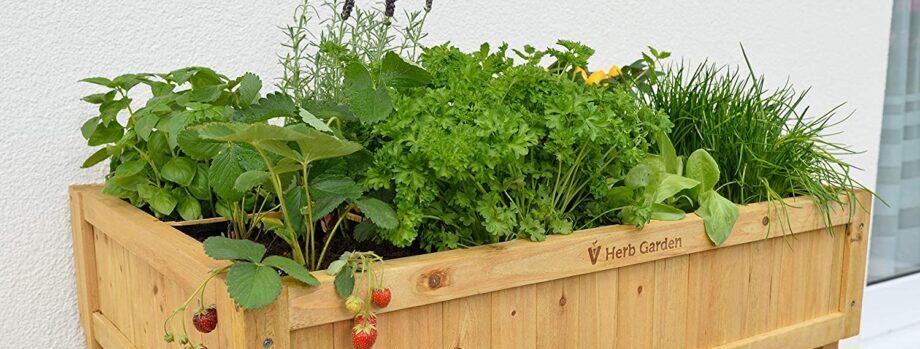
vegetable growing sheet

Herbs Growing Sheet

herbs growing sheet

Harvesting

harvesting

Enjoyment of the fruits, as well as herbs and vegetables, of your labor starts with a good harvest. Pun intended.

Herbs are best harvested just before the flower buds appear since this is when they are at their most flavorful. You’ll want to trim them such that you leave at least four inches below a pair of leaves in order to promote good regrowth.

Vegetables are best harvested as early in the morning as possible because sunlight raises their pulp temperature. The lower the pulp temperature at the time of harvest, the longer the shelf life of the harvested vegetables, so the earlier you start the better. Tomatoes are especially susceptible to chilling injuries and should never be refrigerated, while leafy greens will keep longer if picked directly into a bucket or bowl of cold water. In order to extend their life, leafy vegetables like lettuce can be harvested a few leaves at a time. Start with the outside leaves and leave the center of the plant to continue to grow.

Removing mature vegetables encourages the plant to set additional blossoms and yield more, so harvest them often. When vegetables like beans and tomatoes are allowed to over-ripen, they produce a chemical that inhibits further blossoming. As you approach the end of the growing season pinch off the last blossoms to redirect plant energy to maturing vegetables that have already set.

Taking care of plants

taking care of plants

Watching and caring for your plants is one of the most rewarding experiences that gardening has to offer. Your first job is to ensure your plants have the necessary nutrients for them to thrive. The basics are covered in the Nutrients section.

A few other clever tricks will also help you to push your plants to reach their maximum potential. For example:

  • Flowers will bloom more abundantly if blossoms are removed as they wilt and fade. This process is referred to as dead-heading and it prevents flowers from going to seed.
  • Vegetables produce better yields if fruits are picked as they mature.
  • When choosing a container for single perennials and houseplants, choose one that is 1 or 2 inches larger all around than the previous pot. Plants do not like new pots to be too big, although they do like to be able to grow into them a little.
  • Plants that wilt even though you water them frequently may be suffering from heat stress. Try placing the container in a spot where only the leaves are exposed to direct sunlight, or insulating the pot by placing it in another larger container to create a rudimentary airpocket to help regulate temperature. Garden365 planter are double walled for that purpose.
  • Pinching out the growing tip at the top of a plant a little before it reaches its maximum height will encourage branching and bushiness, creating a fuller and healthier looking plant. This can also encourage further flowering and fruiting in some plants.

Selection of plants for a container garden

selection of plants for container garden

With a little care, just about any type of plant can be grown successfully in a container garden but smaller plants are better adapted to thrive in containers. Vegetables and flowers can also be combined to make very attractive displays. Companion planting, covered in Natural Pest Control, is a great way to arrange plants so that they will benefit each other.

The seed packet is a good place to start when contemplating the depth and spacing requirements of your plants. If you’re planting directly in the container it is better to overseed and thin the plants later to prevent them from overcrowding. If you’re planting in seed starter kits, you won’t have to worry about depth and spacing until your seedlings have grown big enough to transplant into their container. Seeds sprout best in warm and moist conditions, so make sure they get both. Let them grow until they’re stocky enough to survive transplanting but do not let them bloom in the seed starter.

To get the most bang for your buck, you may want to overcrowd your container garden. Crowded containers definitely look more spectacular, so go big right from the start. Just keep in mind that plants in overcrowded containers will need extra organic fertilizer and micronutrients in order to thrive, and that this approach is best suited to ornamental plants and herbs, rather than vegetables that produce fruit, like tomatoes and peppers. Don’t forget that that you can always trim plants back later if needed.

selection of plants for container garden

Importance of Drainage in container gardening

Importance of Drainage in container gardening

Drainage is especially important when it comes to container gardening. Excess water around their roots can deprive plants of oxygen, eventually drowning them. Similarly, a moist oxygen-deprived environment is the ideal breeding ground for root-killing molds. Make sure your growing medium drains well (see Growing Medium) and that your containers have ample drainage holes. One of the handy features of specialized containers is that they have threaded drainage ports which can be opened or closed as needed. This allows you to close the drainage port when you bring your container garden indoors and vice versa. You can also use the ports with automatic watering systems or to control where water drains.

There is a lot of debate in the gardening world about the use of a drainage layer made of stones or pebbles at the bottom of container gardens. In my opinion, this is unnecessary and deprives plants of much needed growing space. This layer may also retain moisture, causing more problems than anything. Using a properly formulated container gardening growing medium is a much better option.

If you’re gardening on a deck or patio, be mindful of where containers are draining. Excess moisture underneath your planter can damage wooden decks and runoff can stain various surfaces. Elevate your container gardens to provide airflow and eliminate moisture issues. There are plenty of elevated and mobile container gardening solutions out there and they’re well worth the investment. You can also make your own stand if you’re DIY inclined.

Importance of Drainage in container gardening

Growing medium for container gardening

Growing medium for container gardening

In order to grow healthy plants, a growing medium must be able to consistently supply water and nutrients, as well as, provide a structure in which your plants can take root. There are two categories of growing mediums typically used in container gardening: soil mixtures and soil-less mixtures.

Soil mixtures, which are widely referred to as potting mixes, are often heavy and hold water and nutrients more easily than soil-less mixtures. They are traditionally composed from soil, compost or peat moss, and vermiculite or perlite. Composted manure can also be added to soil mixtures to increase water-holding capacity and the abundance of nutrients.

These mixtures are typically cheaper than soil-less mixtures, and those that contain compost or composted manure require fewer applications of fertilizers and micro-nutrients because they already contain the majority of nutrients that your plants will need to grow.

However, I generally discourage the use of soil mixtures in container gardening because they are prone to compacting, which can inhibit root growth, affect aeration, and cause poor drainage. They are much heavier than soil-less mixtures making moving and handling container gardens more difficult. Soil mixtures are also more likely to contain weeds, seeds and disease, particularly when they contain compost or unpasteurized soil. The flaws seem to outweigh the benefits in most cases so soil-less mixtures are a better option for container gardening.

Growing medium for container gardening

As the name suggests, soil-less potting mixtures do not contain soil. Instead, they are commonly made from sphagnum moss, peat moss, coconut coir fiber, perlite or vermiculite. This type of growing medium is sterile, offering the added benefit of being weed, seed, bacteria and disease free. For most gardeners, this offers the assurance that your seedlings will not be susceptible to attack by pre-existing diseases and organisms, allowing your plants to thrive.

Potting soil-less mixtures are lighter than traditional soil mixtures, which make them a good choice for raised container gardens and vertical gardens, which have the potential to buckle under heavy loads. Lighter medium also means less compaction, greater aeration, and more consistent drainage. Because soil-less mixtures can be created from a variety of components, they allow you to customize the physical structure of the soil to meet specific plant needs.

In comparison to soil mixtures, soil-less mixtures do require more frequent applications of organic fertilizers and micro-nutrients, as they often lack the full range of nutrients necessary for healthy plant growth. However, this factor can actually be an advantage because by ensuring that your plants’ specific nutrient needs are being met, you are also ensuring that your plant will yield abundant produce of the highest quality. Keep in mind that careful attention must be paid to the level of salts present in fertilizers to prevent buildup in container gardens. It should also be noted that due to the ease with which soil-less mixtures drain, fertilizers and micro-nutrients may need to be applied regularly.

Container gardening and size of Container

Container gardening and size of Containers

When it comes to container gardening, size can make all the difference. The general rule of thumb is: the bigger the better. Plants need plenty of room to spread their roots in order to thrive.

When growing vegetables in particular, the best yields are obtained when plants are grown in a container which as at least half as deep as the plant’s mature height. Therefore, most vegetables require containers that hold 6 to 8 inches of potting mix. Tomatoes, squashes and other large plants require deeper containers, as do root crops such as carrots and beets. However, the growing medium in deeper containers is more prone to compacting, so 12 to 15 inches is all you really need to grow most plants. Even fruits like lemons, blueberries and papaya can be grown in containers of this size with regular attention.

Large containers are also more forgiving as the extra soil or growing medium provides insulation for the plants’ roots; they are less likely to dry out than smaller containers, and also take longer to heat up on sunny summer days, preventing heat stress and wilting. However, there is an obvious trade-off between size and portability, so chose the container that best accommodates your needs. There are many dwarf varieties of plants that have been developed specifically for container gardening and are more likely to thrive in smaller containers if your place can’t accomodate a larger one.

Container gardening and size of container
Container gardening and size of containers

Recommended minimum container size for various plants

NamesHanging planterSmall 4”-6” planterMedium 8”-12” planterLarge >12” planter
VEGETABLES
BEANS (BUSH)green tickgreen tick
BEANS (POLE)green tickgreen tickgreen tick
BEETSgreen tick
BROCCOLIgreen tick
CABBAGEgreen tick
CARROTSgreen tickgreen tick
CAULIFLOWERgreen tick
CORNgreen tick
CUCUMBERSgreen tickgreen tick
EGGPLANTgreen tickgreen tick
LETTUCEgreen tickgreen tickgreen tick
MELONSgreen tick
ONIONSgreen tickgreen tick
PEASgreen tickgreen tickgreen tick
PEPPERSgreen tickgreen tick
RADISHESgreen tickgreen tick
SPINACHgreen tickgreen tickgreen tick
SQUASHgreen tick
SWISS CHARDgreen tickgreen tick
TOMATOgreen tickgreen tick
CHERRY TOMATOgreen tickgreen tickgreen tick
TURNIPSgreen tickgreen tick
HERBS
BASILgreen tickgreen tickgreen tick
CHIVESgreen tickgreen tickgreen tick
DILLgreen tickgreen tick
LAVENDERgreen tickgreen tickgreen tick
MINTgreen tickgreen tick
PARSLEYgreen tickgreen tickgreen tick
ROSEMARYgreen tickgreen tick
SAGEgreen tickgreen tick
SUMMER SAVORYgreen tickgreen tickgreen tick
WINTER SAVORYgreen tickgreen tick
THYMEgreen tickgreen tickgreen tickgreen tick
FLOWERS
ANNUALS <12” IN HEIGHTgreen tickgreen tickgreen tickgreen tick
ANNUALS >12” IN HEIGHTgreen tickgreen tick
ANNUAL VINESgreen tickgreen tickgreen tickgreen tick
PERENNIALSgreen tickgreen tick

Containers for Container Gardening

containers for Container Gardening

One of the most exciting aspects of container gardening is the huge number of container options available to suit your gardening needs. Almost any type of container can be used for gardening as long as it large enough and provides for adequate drainage. You can choose from sleek ready-made container gardens, re-purpose an existing container, or make your own from various materials such as wood or concrete. Look for containers that are:

  • Large enough to sustain the plants you are trying to grow;
  • Offer good drainage; and
  • Are appropriate for your gardening space.

The material that containers are made of plays an important role in the rate at which water evaporated from the soil or other medium that sustains your plants. Containers typically fall into two categories: porous and non-porous.

Plastic, metal, glass and glazed ceramic containers are non-porous and are great for outdoor use because they slow the rate at which water will evaporate from the container. This means that your plants will have more consistent access to moisture, and you will have to water them less often. In addition, non-porous containers can be left outdoors over winter because they don’t absorb water and are therefore less likely to crack when temperatures dip below freezing.

Porous containers, such as those made of clay, fabric and wood, are all popular options but do require a little extra care. They’re not as good at slowing evaporation and as a result require more frequent watering. Since they do absorb water, it is better not to leave them outdoors over winter in colder zones where temperatures dip below freezing.

If you do decide to go with a wooden container, stay away from pressure-treated lumber; it is impregnated with toxic chemicals which are likely to leach into the soil, and can be absorbed by plants. The same can be said for shipping crates, which are often used to make small vertical gardens. Safer options include redwood and red cedar, both of which are naturally water resistant and make an excellent choice for container gardening. Other types of wood may also be used, but should be sealed or lined with plastic in order to decrease evaporation and prevent the wood from rotting.

One of the main advantages of using containers specifically designed for container gardening is that they provide handy features that are not otherwise available in conventional pots. Many solutions are mobile so they can be taken indoors during the colder months, or moved around to receive maximum sunlight. Self-watering and wicking containers, which help to reduce the evaporation of water, are also widely available. Elevated gardens are easier on the knees and back and are generally more enjoyable to use. They’re also an excellent choice for decks and balconies where railings screen out the sun. Vertical and hanging planters are great for making better use of space and can be used to grow many plants upside-down. The images below depict some of the many different options available today.

containers for Container Gardening Regular Plant Pot
Regular Plant Pot
containers for Container Gardening Buckets
Buckets
containers for Container Gardening Container Garden Planter
Garden Planter
containers for Container Gardening Hanging Garden
Hanging Garden
containers for Container Gardening Elevated Garden
Elevated Garden
containers for Container Gardening Mini Elevated Garden
Mini Elevated Garden
containers for Container Gardening Mobile Garden
Mobile Garden
containers for Container Gardening Mini Mobile Garden
Mini Mobile Garden

Location for Container Gardening

locations for containers gardening

In real estate and gardening alike, location is of critical importance. You may not always get a choice but if you do, try to locate your container garden in an area that:

  • receives at least 6 hours of sunlight per day;
  • has good air circulation but is not too windy;
  • is close to a water source; and
  • has convenient access to tools and equipment.

Light is the most important of the above considerations by far. Most plants require at least 6 hours of sunlight per day so choose your location accordingly if possible. If you’re gardening indoors, South facing windows offer the most light. If gardening location options are limited, you can always supplement the sunlight received by your Indoor garden with artificial growlights designed to mimic natural sunlight. These are readily available at most garden centres and hydroponic supply stores.

location for container gardening
locations for container gardening

If you’re gardening outdoors, keep track of shadows cast by the house, trees, railings, and any other obstacles. If such obstacles are unavoidable, consider gardening in elevated or mobile containers in order to ensure that your plants receive sufficient sunlight. Containers are very versatile and are one of the most flexible gardening solutions to suit all conditions and spaces. They will easy adapt to your gardening needs.

Location Hardiness Map

The North America Hardiness Zone Map is the standard by which gardeners and growers can determine which plants are most likely to thrive at a particular location.

Location for Container Gardening- hardiness map

Couples Gardening For Better Overall Health

couples gardening for better health

Couples Gardening For Better Overall Health:

Many men and women love to garden and they typically gain substantial health benefits from the process. Gardening is a great hobby for couples to do together. It serves to get partners moving together and it helps to reduce stress and other mental health issues. It may take a bit of work for find the right rhythm in gardening as a couple, but the rewards can be substantial.

Plan ahead to keep gardening with your partner harmonious

Female First suggests that couples take some time to discuss their plans before planting a garden together. For example, you may want to discuss what type of garden you plan to have, whether it be focused on vegetables, fruits, flowers, or a combination of items. It can also be helpful to discuss the various tasks related to garden upkeep and determine who is responsible for what so nothing is overlooked and nobody gets frustrated over something not getting done.

Some pairs may decide to divide the gardening space so that each partner can do as they please with their space. NPR details that it can be challenging for partners to agree on aesthetics in a garden plan as everybody’s personal taste and style plays a role in how the space is utilized and what plans are chosen. While there are benefits to partners sharing a gardening space and plan, breaking the space up may work best in some scenarios.

Of course, working together successfully on a shared area can bring a major sense of accomplishment and the process of deciding what to plant where can bring an opportunity to work on problem-solving as a couple. As the Statesman Journal shares, gardening is also a great outlet for socializing and it can provide much-needed time for busy couples to reconnect and communicate with one another.

An ideal outlet for physical exercise with a partner

Many couples like to find physical activities they can do together, but different skill levels or interests can make traditional workouts challenging to do in pairs. According to Prevention, couples who tackle a fitness program together are more likely to stick with it in comparison to going it alone. Gardening is an ideal physical activity to do as a couple, as each partner can easily dig in at different paces and nobody gets frustrated trying to keep up.

Whether a couple works side-by-side on planting, weeding, and tending to the plants or they divide and conquer with each partner taking on different tasks, everybody gets to be active and benefit from some quality exercise. It may come as a surprise to some, but gardening can provide a serious workout for both men and women. For example, the Daily Mail notes that research has shown that three hours of gardening can provide similar results to an intense hour of working out in the gym.

Gardening sparks substantial mental health improvements too

The physical benefits that come from gardening can do wonders for couples, but the mental health benefits may be even more substantial. Study results shared via NCBI detailed that gardening can significantly reduce feelings of depression. While exercise in general has a major impact on improving one’s mental health and decreasing depression, gardening seems to have a particularly positive effect on one’s mental well-being, and this can have a significant impact on a couple’s overall relationship.

Gardening is a great activity for couples looking to connect with one another in a relaxing setting, and it provides an opportunity for physical activity too. Not only can couples improve their physical health by gardening together, but they can improve their mental health and reduce stress levels and issues with depression and addiction as well. In fact, some would say that gardening may well be the total package when it comes to an activity that partners can enjoy together while also improving their overall health.

Free Container Gardening Guide

container gardening

Free Container Gardening Guide:

For a limited time, you can download my full color container gardening guide absolutely free! Over 100 pages of advice, photos, DIY tips, charts, and infographics are all at your fingertips, free for the taking when you subscribe to our community. You won’t be disappointed.

Container Gardening Guide Guarantee

Our subscription is fully compliant with all anti spam laws and you can opt out at anytime, for whatever reason… but I’m sure you wont want to;)

Please help me make this container gardening guide better by sharing any tips or advice of your own on using the comments form below. I hope I can count on your help in spreading the word about container gardening and Garden365. Please share this page with your friends.

Pro Flower Container Ideas and Tips

Growing flowers in containers

Pro Flower Container Ideas and Tips:

I hope these flower container ideas and tips spark your imagination. Let’s start by covering some basics. Flowers typically fall into two categories; annuals and perennials. Large outdoor planters are the perfect way to grow these living bouquets! Many are easy to grow from seed, meaning that you can experiment with a variety of different types of flowers very economically, and even save your own seed. Annuals are often purchased as pre-planted flowering pots. Countless varieties are available at hardware stores, supermarkets, and garden centers. These plants can add instant color to a container garden, and are an excellent way to quickly replace an under-performing plant in an otherwise stunning display. However, because they have usually begun flowering well before we buy them, they do not bloom for as long as plants grown from seed nor are they as hardy.

In order to extend the life of your flower displays, keep the spent flowers trimmed off. This is called “deadheading.” Removing the flowers before they can set seed encourages the plant to produce even more flowers. Flowers make excellent displays on their own, or can be combined with herbs and vegetables for a stunning and edible display! Edible flowers, like nasturtiums and pansies, make a fantastic addition to summer salads. Because annuals live only one season, you can choose a new look for your container each year. When you design your annual container, keep in mind these flower container ideas and tips:

  • Consider foliage plants with interesting shapes, colors, or textures as the “background” of your composition.
  • Keep the color wheel in mind: If you want the colors to pop, choose colors from opposite sides of the wheel—like purple and yellow. If you want a more soothing look, choose analogous colors—those that are next to each other—like shades of pink and pastel oranges.
  • Shapes of flowers add interest to the arrangement. Use a variety for best results.
  • If plants get leggy or overgrow the container, trim them back. When they are truly spent, did them up gently and replace them.
  • Plant more flowers than you would normally plant in a garden. You want to keep the bloom dramatic.

Good choices for containers in sunny spots are marigolds, geraniums, sunflowers and petunias. In part-shade, alyssum, lobelia, nemesia and nicotiana all bloom well. In very shady areas, try impatiens, pansies and violas. Perennial foliage plants like yucca and lamb’s ear, or attractive herbs like lavender, mint and thyme, make excellent foliage plants as the “background” to a composition.

Popular Flower Choices

Below is a list of 25 popular choices suitable for container gardening:

flower container ideas

Share Your Flower Container Ideas

I hope this article sparked some flower container ideas and I would love nothing more than for you to share them with us. Nothing sparks creativity like inspiring images of beautiful arrangements. Please use the form below to share your creations with the rest of our community. Thank you for stopping by.

Growing Perennials In Containers

Growing Perennials in Containers

Growing Perennials In Containers:

Perennials are plants that die back to their roots in winter and grow back again in the spring, year after year. Growing perennials in containers is not difficult. There are lots of beautiful perennials to plant. Many perennials bloom for a long time. Another advantage of perennials is that they save you money over time because you don’t have to buy new plants every year.

Care of perennials is similar to that of other plants. One difference is that if growth becomes less vigorous after a few years. When your plant starts looking weaker, it needs to be divided. This means that when the plant is dormant (not in the active growing season) it should be dug up refresh the root ball. The procedure is simple. You dig up the root ball and cut or pull apart the clump of roots. Keep the younger, healthier-looking parts of the roots and replant them in the soil. Your perennial may appear a little weaker right after division, but will bounce back with a burst of vigor.

Perennials

Perennials can do very well in container gardens. If you live in a very cold climate, the delicate perennial root system can freeze over the winter. Always choose plants that are suitable for your growing zone and use large containers. The larger the container, the better chance the plant will have to survive the cold. If you live in a warm climate, planting the perennial in the fall gives it a good chance to develop a strong root system over the winter for spring growth.

Popular Perennials For Containers

Below is a list of 25 popular choices suitable for container gardening. Perennials that grow and are more likely to survive the winter frost in containers include salvia, campanula, phlox, scabiosa, and daylilies.

Growing Perennials In Containers

Growing Perennials In Containers

Growing perennials in containers is rewarding year after year. Beautify your home with a gorgeous floral arrangement. You can also grow many different edible plants. Whichever route you choose, container gardens are an excellent way to grow these very resilient plants.

Hanging Tomato Planter Setup

hanging tomato planter

Hanging Tomato Planter Setup:

Hanging tomato planters will make growing tomatoes on your deck, balcony, or patio a cinch. They offer many advantages over conventional planters. Tomato plants can grow very large and require a lot of support to keep the vine from failing under its own weight. Hanging tomato planters eliminate that problem. Plants in conventional planters are also prone to getting damaged by getting knocked over by accidental bumps, gusts of wind, and boisterous pets or kids. A hanging tomato planter will put your plants out of harm’s way.

I designed the Garden365 Hanging Garden specifically for growing tomatoes upside down. There are many hanging tomato planter choices on the market but none offer the same blend of function, versatility, and style. I tested them all. My patented design offers the ability to grow plants on top and bottom, a large water and soil volume, and a very versatile hanging bracket. You can hang it on just about any wall, railing, or fence (including chain link).

Garden365 Hanging Tomato Planter Installation

Planting Tomatoes Upside Down

Planting and growing tomatoes in the Garden365 hanging tomato planter is easy. Start by removing the drainage platform from the planter. Fold back the triangular plant clamps. If your plants are large, plant clamps can be cut off altogether. Place the drainage platform back in the planter.

Garden365 Hanging Tomato Planter Drainage Platform
Garden365 Hanging Tomato Planter Drainage Platform Details
Garden365 Hanging Tomato Planter View From Above

Remove your tomato plant from the blister pack and break apart its roots. Roots should be free to grow in all directions as shown below.

Tomato Plant Root Preparation

Push the roots through the planter and the drainage platform. This step may take a bit of patience with larger plants, depending on the size of the root bulb.

Inserting Tomato Plant into Garden365 Hanging Tomato Planter

Once the root bulb is inside the hanging tomato planter, fill it with a quality potting mix. Soil-less potting mixtures offer many advantages over conventional soils, especially when it comes to growing tomatoes in pots.

Roots of Tomato Plant Inside Garden365 Hanging Tomato Planter

Hang your planted hanging tomato planter on the fence or wall. At this point you can plant other plants in the top. Tomato plants are demanding and are best paired with less demanding herbs. Some good companions include chives, basil, or oregano.

Hanging Garden365 Hanging Tomato Planter On Fence

Hanging Tomato Planter Examples

A hanging tomato planter is a great option for any urban gardener or gardenista. Tomatoes are not the only plants that can be grown upside down. There are many other choices worth experimenting with. Here are several images kindly shared with me by some of the early users of the Garden365 Hanging Garden along with some of my own.

Garden365 Hanging Tomato Planter Example
Thank you for taking the time to view my post. Please use comment section below to post photos or share your experiences with hanging tomato planters. I’d love to hear all about it. Let’s grow happily ever after.

Growing Tomatoes in Pots and Containers

growing tomatoes in pots

Growing Tomatoes in Pots and Containers:

Growing tomatoes in pots is a great way to make the most of your patio or balcony garden. With a bit of care, growing tomatoes in pots can yield sweet, large and delicious fruit. Start with the right variety of tomato plants. Tomatoes can be demanding and not all varieties do well in containers. Cherry tomatoes are hardy and are an excellent choice. Other varieties of tomato plants have been bred specifically for container gardening. Some good container tomato varieties include:

Most reputable garden centers usually offer several different container tomato varieties. Finding one should not be a problem.

Growing tomatoes in pots - popular varieties.

Use a Soil-less Potting Mix

Choosing the best potting soil for your pot is also very important. I recommend soil-less mixes for container gardening because they’re light. They also provide good aeration and drainage. They’re not as nutrient rich as soil based mixtures so periodic use of organic fertilizers is highly recommended when growing tomatoes in pots.

Morning Sunlight is Best

Tomato plants love sunlight and should get at least 6 to 8 hours of it per day. Morning sunlight is better than harsh afternoon sunlight. Study your space and choose a location accordingly. Pots are easy to relocate so growing tomatoes in pots makes it easy to experiment with different locations.

Water Regularly

Water tomatoes regularly and don’t let your pots dry out. Larger pots are more forgiving in this respect and many offer a self watering feature. Water your plants at the soil line because plants absorb water through the roots. Moisture on leaves can also lead to problems. Watering in the morning is most recommended.

Use a Large Pot

When it comes to growing tomatoes in pots, not all pots are created equal. A large pot will provide more nutrient rich growing mix so your plants are more likely to thrive. They’re also less likely to dry out on hot summer days. My hanging garden was designed specifically for this purpose so it’s always a good choice. There are many other large pots you can choose. Look for a large pot with good drainage.

Grow Tomatoes Upside Down

Growing tomatoes upside down offers several advantages over growing them right side up. Tomato plants are vines and vines have to be supported by staking or caging. An upside down tomato planter eliminates the need for support. Plants hang freely and are less likely to break under their own weight. Also keep in mind that tomato plants can grow very large. Growing them upside down puts them out of harm’s way. They’re far less likely to get knocked over and injured by an accidental bump, gust of wind, or a boisterous pet or child.

Growing tomatoes in pots with Garden365 Hanging Garden

Growing Tomatoes in Pots

Growing tomatoes in pots is a great way to grow these delicious fruits. Following above guidelines will help you to grow large healthy plants. Using the right pots for the job will make that job much easier. Please consider my Hanging Garden Planter which was designed specifically for this purpose.

Patio Garden Ideas and Solutions

patio garden

Patio Garden Ideas and Solutions:

Products featured in our photo gallery have been cultivated by us and our customers. Thank you to everyone who shared their beautiful creations. We hope the urban gardening ideas presented here inspire you. We would also like to encourage you to share your work with as well. Thank you and have a great day!

Balcony Garden Ideas and Solutions

balcony garden

Balcony Garden Ideas and Solutions:

All awesome balcony garden ideas start with a vision and a plan. Do some soul-searching to figure out what function you want that place to serve. Think of your balcony garden as a product. If it doesn’t do what you want it to do, you won’t like it no matter how pretty it looks. Start with the end in mind. Ask yourself three basic questions such as:

  • How do I want to spend time on my balcony?
    – Gardening, entertaining, reading, relaxing, etc.


  • Are there any special events or activities that I’d like my balcony to accommodate?
    – Intimate dinner, party for two or more, quiet contemplation, etc.


  • How many people are likely to join me?
    – Mostly one or two but sometimes up to X


Once you have a pretty good idea of how you’re going to use that space, put it down on paper. This will help to turn your balcony garden ideas into a reality in a more manageable manner.

Get to know your balcony.

Get to know your space before running out to the garden store. Not all balcony garden ideas will work on your balcony. Spend a day making notes about where the light hits, how long it stays, and any periods of shade. Note the direction that your balcony faces. Knowing these basic details will help you to select the best plants and products of balcony garden ideas for your space. Plants have needs that you have to provide for so they can flourish. Well designed container gardens will help you to meet those needs. I designed Garden365 container gardens to meet unique needs of urban gardeners in terms of mobility, ergonomics, and versatility so that’s a great place to start. There are many others to choose from.

Balcony-garden-ideas-02

Check to make sure your balcony can handle the load.

Not all balconies are built to the same standard. Gardening containers can add a lot of weight to the structure so it is wise to check with someone before proceeding with new balcony garden ideas. Talk with your landlord, property manager, or an engineer to make sure it can. In most cases you’ll get the green light but it is always good to make sure.

Start with small incremental steps.

Time and money are in limited supply for most of us so don’t bite off more than you need to all at once. Quality plants and gardening containers can be expensive. Realize your balcony garden ideas in small incremental steps. Start with a small project and do it well. Then relax and celebrate your accomplishment as you go along. Then rinse and repeat until all your garden dreams are realized.

Less is more.

Once you get a good idea of how much your balcony can handle choose your containers accordingly. It is better to go with fewer large planters than many small ones. Large gardening planters and containers hold more soil, water, and nutrients. In result they’re more forgiving and your plants will thank you for your generosity with gorgeous blooms. Balconies can also get windy so large planters are a must in most cases of balcony garden ideas.

Keep it off the floor

Moisture can damage even the toughest of surfaces like concrete so it is important not to put gardening containers directly on the floor of your balcony. That’s why all of Garden365 gardening planters are designed to provide for airflow underneath. Elevated and mobile planters are also much more comfortable to work with so you really can’t go wrong.

Balcony-garden-ideas-01

Use top dressings and mulches

Balconies can get a lot of sun and wind. The combination of the two can quickly dry out your soils and kill even the most draught resistant of plants. Using top dressings such as pebbles, bark chips, or agricultural grit helps to keep the moisture from evaporating. It also adds a great finishing touch to tie your container gardens together aesthetically.

Make room for seasonal accents.

Your balcony garden ideas should include a way to celebrate the seasons by adding seasonal accents to your garden. Seasonal flowers and holiday ornaments are a great way to spruce up your garden with a celebratory touch.

Aim for minimum maintenance.

Maintenance is a chore so you’ll want to keep it to a minimum. I’m pretty sure you didn’t include it when you sat down at the beginning and contemplated long and hard about your balcony garden’s greater purpose. Here are some useful ways to keep needless maintenance from creeping back in:

  • Use large containers to provide your plants with more essential nutrients.
  • Use quality soils and growing mediums specifically intended for container gardening.
  • Use top dressings and mulches in all containers to keep plants well hydrated.
  • Automate plant watering if possible using an automated drip irrigation setup.
  • Use fewer larger container gardens to keep clutter to a minimum.
Balcony-garden-ideas-infographic

Best Balcony Garden Ideas

I hope my tips sparked some great balcony garden ideas of your own. Realizing your vision will undoubtedly prove very rewarding. Take your time and enjoy the journey. I love hearing from urban gardeners and gardenistas so please so please don’t hesitate to drop me a line.

Water Feature Ideas and Solutions

water garden

Water Feature Ideas and Solutions

Products featured in our photo gallery have been cultivated by us and our customers. Thank you to everyone who shared their beautiful creations. We hope the water feature ideas presented here inspire you. We would also like to encourage you to share your work with as well. Thank you and have a great day!

Container Gardening For Beginners

couples gardening for better health

Container Gardening For Beginners:

Container gardening is a great way for beginners to get growing. Many popular herbs, vegetables, and flowering plants can be grown with ease in container gardens. The first step starts by deciding what you want to grow. Just about everything commonly grown by gardeners can be grown successful in containers. Herbs are perhaps the easiest plants for container gardening for beginners to start with. Growing tomatoes in pots is always a great choice. Once you decide on what you want to grow, it is time to connect the rest of the dots. Here’s a summary of the general guidelines for container gardening for beginners.

container gardening for beginners

Choose The Right Potting Mix

Choosing the right potting mix is essencially important when it comes to container gardening. There are many potting mixtures to choose from. Choose a mixture that is best suited to what you want to grow. This will ensure your plants get the right combination of essential minerals and organic materials they need to grow. As a general rule of thumb your soil should be well aerated, not compacted. It should feel almost fluffy as it sifts through your hands. Soil that is not well aerated or too densely compacted may have problems draining. This can lead to problems with the health of your plant’s root systems. There are special mixtures formulated for container gardening for beginners that come enriched with fertilizers. They’re a good place to start.

Choose The Right Gardening Container

Choosing the right container garden planter is very important. Portable planters can extend the growing season since you can move them indoors and outdoors as needed. Some plants are sticklers when it comes to their ideal growing temperatures so having a portable planter at your disposal is very handy.

Elevated planters are great for growing on balconies or patios. They’re higher up so they’re not shaded by railings and are more comfortable to garden in. Your lower back and knees will love them. They’re also less accessible to common garden pests, weeds, as well as, house pets. As such, they cut down on maintenance quite a bit. They’re a great container gardening option for beginners and experts alike.

Vertical gardening planters are a great choice if you’re tight on space. They’re especially handy if you’re interested in growing tomatoes. Growing tomatoes upside down offers many advantages over growing them right side up. Upside down tomato planters eliminate need to support the vine. They’re a must have if you have pets.

container gardening for beginners

Pick the Right Spot

The old adage that a gardener with a green thumb can grow anything is not always true. Some plants just simply don’t do well under certain conditions.
Find out how much light your plants require and choose a growing spot accordingly. Most plants come with a tag which specifies their light and growing requirements. If your location choices are limited, a good container can offer unique options. For example, if you’re growing plants on a balcony which is shaded by a railing, an elevated or vertical garden planter may be a good way to go.

container gardening for beginners

The Right Amount of Water is Essential

Water is the source of life. The trick is getting the right amount of water your plants require right. Before you even begin, make sure your planter has proper drainage to reduce the chance of root rot. Overwatering your plants is a common beginner mistake. It leads to many critical root problems and should be avoided at all cost. It is usually best to let the soil in your container to dry between watering.

container gardening for beginners

Container Gardening for Beginners

In summary, container gardening starts with choosing what you want to grow. A potting mixture must then be chosen to best suit the needs of your plants. A suitable growing spot along with an appropriate container garden planter must then be selected to meet the sunlight needs of your chosen plants. Last, but not least, your plants must be watered according to the needs of your plants.

Thank you for reading my article on container gardening for beginners. I hope you found my advice helpful enough to get you started. As always, I invite you to share your experiences, comments, and suggestions with me using the form below.

Organic Garden Pest Control For Container Gardens

organic garden pest control for container gardens

Organic Garden Pest Control For Container Gardens:

Organic garden pest control is a great way to grow healthy plants without the use of harsh chemicals. There is no shortage of tiny, opportunistic insects ready to invade your garden. With planning and basic care these pests can be managed without sacrificing your favorite plants. Here are few tips for organic garden pest control.

Prevention

The easiest form of organic garden pest control is prevention. Container gardens offer a unique advantage over earthbound gardens in that they can be moved and sterilized with ease. Pest control doesn’t have to be hard. Try planning your pest management methods as you plan for your new garden each spring. Companion planting is a great way to grow plants such that they repel different pests.

The first step in organic garden pest control is to wash your container gardens thoroughly. Washing helps to ensure that no insect eggs are present in the container as you begin to plant. Next, consider using a sterile potting mixture. This will prevent insects and their eggs from being transplanted from the soil into your garden.

Many garden pests enter your home and garden with new plants. Insects will often hitch a ride on store bought plants, so check them thoroughly before purchasing. Check the undersides of leaves as they are often a hiding place for small insects and their eggs. If you purchase a plant with signs of insect damage wash the plant thoroughly to ensure that all pests are gone. Delay planting a plant that shows signs of recent infestation to ensure it will not infest other plants in your garden.

Locate your plants in a room, balcony, or patio according to the conditions they grow best in. When left in the proper environment, plants will thrive and are more likely to resist infestation by insects. If you notice your plants are looking spindly or wilted, move the container garden. Having a mobile container garden is especially handy in this case

Treatment

Many of the large insect pests such as tomato hornworms and caterpillars can be removed by hand. Make sure you wash your hands after touching infested plants. It is all too easy for an intrepid aphid to hitch a ride on your fingertips to a new container garden. Tools should also be cleansed after working in an infested garden. Use a garden hose to wash down plants infected with smaller bugs such as aphids.  The stream of water emitted from the hose will remove most insects.

Plants that have severe infestations should be removed from planters to prevent further infestation. Keep an eye on the remaining plants to ensure that they do not show signs of pest damage before replanting.

organic garden pest control - common garden pests

Organic Garden Pest Control

Knowledge is power in organic garden pest control. Get to know your common garden pests before choosing an appropriate treatment. Use the handy reference guide above to identify the culprits. Having a better understanding of their life cycle will help ensure successful management. There are a number of unique organic gardening products on the market to help treat insect infestations when physical removal does not work. Choose products carefully and be sure to read the label thoroughly before use. Take extra care in choosing products to use on edible plants. As always, please share your tips for organic garden pest control using the comment form below.