Making organic fertilizer instructions

organic fertilizer

Making organic fertilizer instructions:

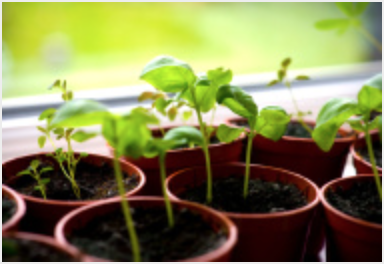
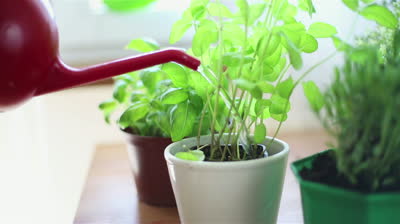
It doesn’t matter how expansive your raised garden is. Whether you only have a small container garden, or even if you are exclusively an indoor gardening enthusiast. Your plants can all benefit from the use of an organic fertilizer. There are numerous organic fertilizers for sale at any garden center; however making your own fertilizer is possible. Making organic fertilizer is more cost effective, even if you have a more limited urban living space.

Go Natural while making organic fertilizer

An organic fertilizer is one which has its origins in all natural and renewable resources. This means no harmful chemicals or other non-natural additives have been included in the creation of the fertilizer. As an informed container gardening enthusiast, you are well aware of the dangers of using chemicals on your plants and in your home.  Especially if you are growing edible plants, you can feel safe in knowing where your fertilizer came from and that its 100% organic. The benefits of making organic fertilizer for your raised garden go beyond this reason, however.

  • Soil Improvement: Fertilizing composts can add to the soils ability to retain and drain moisture. This is essential for a container garden. The quality of the soil in your elevated garden can be improved greatly with the added nutrients organic fertilizers bring with them. If your soil is healthy then your plants will be healthy.
  • Easy & Inexpensive: Making organic fertilizer at home is a lot easier and a lot more budget-friendly than you may have thought it to be. Buying organic fertilizers from your garden center can be rather costly, especially if you have a fairly large collection in your container garden. With just a few simple and inexpensive tools, you can make your own!
  • Reducing Waste: Do you recycle tin cans and cardboard from your home? Let’s hope so. Do you throw out the left over organic materials produced in your home? Coffee grounds, eggshells, newspapers, and vegetable waste often just end up in landfills. If you opt to incorporate these organic-based materials into your homemade fertilizers, you’ll be doing your part for the health of your plants and for the planet!

Here few dos and don’ts while making organic fertilizer.

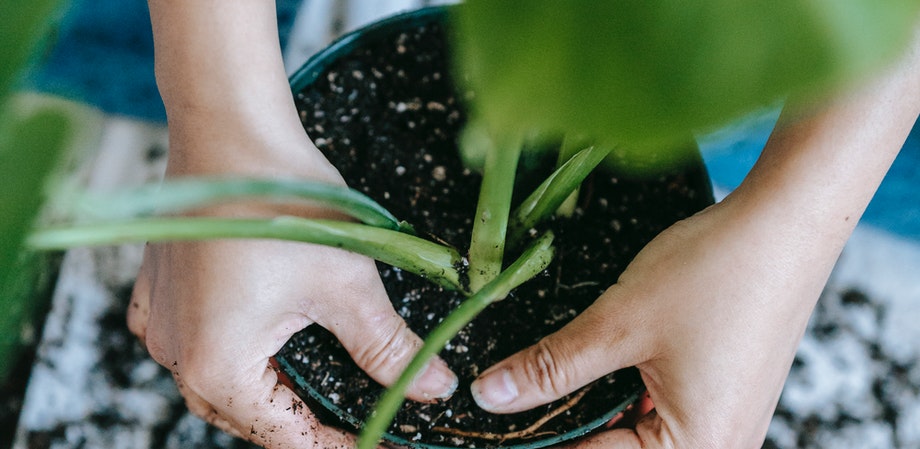
Start With the Right Container for making organic fertilize

There are several types of composters available. These range in price from the extremely budget-friendly to the less-than-budget-friendly. There are also several composters designed to fit under your kitchen sink. This makes them an ideal choice for if you live in an apartment or town home. These little composters will happily accept all of your household compostable scraps and transform them into organic fertilizer. Your plants will simply love these fertilizers.

making organic fertilizer

There are a few things you avoid sticking while making organic fertilizer:

  • Meat should never be used to make an organic fertilizer, especially for a container garden. Not only are you risking the spreading of various harmful bacteria, but you run the risk of attracting insects.
  • Animal waste is not a good idea to add to your homemade fertilizer for much the same reasons as you should avoid adding meat. The waste from animals like rabbits, horses, and cows might be okay to use but it should come from a reputable source and should be composted for up to six months, preferably outdoors.
  • Dairy products are another item to avoid adding to your organic fertilizer. The smell of these, especially if you are indoor gardening, will be enough to remind you of the reasons to avoid dairy products! Dairy also includes bacteria that shouldn’t be introduced into your compost.

These all things play a great role in making organic fertilizer. You can use these homemade fertilizer with all the container gardens.

Growing Anti inflammatory herbs

growing herbs

Growing Anti Inflammatory Herbs:

Anti inflammatory herbs make an excellent addition to your garden and dinner table. These delicious plants are rich in bioflavonoids and polyphenols. Both of these beneficial substances help reduce free-radical production in the body. Anti inflammatory herbs can be added to your diet in several ways. Making herbal tea can be refreshing and comforting. Seasoning cooked meals is always a good option. However, eating freshly picked herbs is most effective in reducing inflammation so consider adding them to your salad. You can also use them raw as a garnish. Adding a fresh leaf of mint to your chocolate dessert won’t turn it into a healthy meal but it’s not a bad place to start. One of the best aspects of growing anti inflammatory herbs is that you do not need a large garden. These hardy plants are easy to grow in container gardens all year long. Let’s take a look at the most popular anti inflammatory herbs.

Parsley

Parsley is rich in vitamins E and B6. It can be used to add flavor to any number of meals, including stews and pastas. This sun loving herb prefers at least six hours of full sun. Your parsley will flourish by a sunny window. If your ledge is not wide enough for a planter, consider using a raised container garden. Parsley comes in many varieties so have some fun with two or more different types.

Rosemary

This popular herb is incredibly heat-tolerant. It can also winter well outdoors. Rosemary is a foodie favorite. It is both aromatic and flavorful and can breathe life into various dishes. Sprigs of rosemary can also be used to add a lovely aromatic fragrance to your home.

Basil

Basil is a sun loving herb. It prefers temperatures over 40 degrees Fahrenheit and will flourish outdoors in the summer. Take it indoors over winter but ensure that it gets at least 4 hours of direct sunlight per day. Basil is an excellent addition to your container garden for its companion planting benefits as well.

Mint

Just about all gardeners can agree that mint is best suited for container gardens. This anti inflammatory herb will grow wildly and has a tendency to spread if left unbound. Mint can be used to flavor curries. It is also great as a garnish for chocolate desserts. Tea lovers will surely enjoy the refreshing benefits of mint tea. Fresh mint is your best option but it can also be dried or frozen

Chives

A must-have for any kitchen, chives are also very easy to grow. They can be grown indoors or outdoors. These hardy herbs can be used to flavor anything from eggs to stews. Remember, like most herbs, the more you cut the more they grow. Chives a herb that keeps on giving.

Anti Inflammatory Herbs

Freshly picked anti inflammatory herbs are not only delicious, they’re full of health benefits. It makes sense to grow them year round if possible. You can grow them just about anywhere although mobile container gardens make it especially easy to move them in and out of the house. If an outdoor garden is your only option, consider drying or freezing your summer harvest of anti inflammatory herbs for use over winter. They won’t be as fresh or beneficial but it’s still better than nothing. Whatever option you choose, these herbs are sure to thrive in your capable hands and will help you thrive in return.

Written by: Tom Korzeniowski
Garden365 | Founder

Best potting soil for Container Gardening

best potting soil

Best Potting Soil For Container Gardening:

The first step to creating a flourishing planter is to choosing the best potting soil that will work with you. In order to grow healthy plants, a growing medium must be able to consistently supply water and nutrients as well as provide a structure in which your plants can take root. There are two categories of growing mediums to choose from; potting soil mixtures and potting soil-less mixtures.

choosing the best potting soil

Potting Soil Mixtures

Soil mixtures are often heavy and hold water and nutrients more easily than soilless mixtures.  They are traditionally composed from soil, compost or peat moss and vermiculite or perlite. Composted manure can also be added to soil mixtures to increase water holding capacity and the abundance of nutrients. Soil mixtures do come with a few disadvantages. First, soil mixtures are prone to compacting, which can inhibit root growth, aeration, and cause poor drainage.

They are also more likely to contain weeds, seeds and disease, especially when they contain compost or unpasteurized soil (Source 2).

Potting soil mixtures are more appropriate for garden beds, or when needing to add extra organic material to an existing garden. Due to their weight, they are not appropriate for a movable container garden, but can be used in a stationary planter. Potting soil mixtures rarely require the addition of fertilizers due to the presence of pre-existing nutrients and minerals.

choosing the best potting soil

Potting Soil-less Mixtures

As the name suggests, soil-less potting mixtures do not contain soil. Instead, they are commonly made from sphagnum moss, peat moss, coconut coir fiber, perlite or vermiculite. This type of growing medium is sterile, offering the added benefit of being weed, seed, bacteria and disease free. For most gardeners, this offers the assurance that your seedlings will not be susceptible to attack by pre-existing diseases and organisms, allowing your plants to thrive.

Potting soil-less mixtures are lighter than traditional soil mixtures, which make them a good choice for raised container gardens which have the potential to buckle under heavy loads. Lighter soil also means less compaction, greater aeration, and consistent drainage). Because soil-less mixtures can be created from a variety of components, they allow you to customize the physical structure of the soil to meet specific plant needs

Unlike potting soil mixtures, potting soil-less mixtures often lack the full range of nutrients necessary for healthy plant growth. For this reason additional organic fertilizers and micro-nutrients will need to be added to meet the nutrient needs of your plants. Careful attention must be paid to the level of salts present in fertilizers to prevent buildup in container gardens. It should also be noted that due to the ease with which soil-less mixtures drain, fertilizers and micro-nutrients may need to be applied regularly.

Best Potting Soil Mix

Now that you have the facts about best potting soil and best potting soil-less mixtures you might be wondering which to choose? The key to making the “right” choice for your garden is to look at the type of planter you are choosing and the type of plants that you wish to grow. If you’re growing in a small, raised container garden, you might want to try a soil-less potting mix for its light weight and sterile quality. However, if you’re growing plants that require a large proportion of organic matter in a stationary planter, a soil based potting mixture would probably be the right choice for your garden.

Take your time planning out your new container garden or redesigning a pre-existing one. You’ll be amazed by what the proper growing medium can do for your plants!

Edible Flowers List: Tasty Colorful Blooms For Your Garden

edible flowers

Edible Flowers’ List: Tasty Colorful Blooms For Your Garden:

Flowers are the perfect complement to container gardens. We hope our edible flowers list makes it easier for you to incorporate them. Brightly colored and sweetly scented, they liven up any green space, especially patios and balconies. But a culinary delicacy as well? Why not? Some special blooms can also liven up salads, cakes and punch bowls.

The Edible Flowers List of Precautions

Like wild mushrooms, you wouldn’t want to start munching down on any old flower. Do your research before tasting any unknown blossoms, because they’re certainly not all edible. And do make sure your breakfast bouquet hasn’t been sprayed by chemical pesticides or fertilizers.

Preparation

Edible flowers can be enjoyed raw, cooked and candied straight from the garden. The blossoms should be used soon after harvesting to preserve their taste and appearance. Wash the blooms gently and remove the stems, stamens, pistils and sepals of the flowers before serving. These can lend a bitter taste to otherwise sweet blossoms. Don’t remove the sepals from johnny-jump-ups, violas and pansies, or the flavours in these particular flowers won’t fully blossom.

The Edible Flowers List : Our top 5

5. Nasturtium (Tropaeolum Majus)

Kicking off our edible flowers list is the vibrant nasturtium flower. Popping up in bright shades of red, orange and yellow, these blooms add a peppery bite to salads. Plant them in direct sunlight to achieve maximum blossom potential. Don’t use fertilizers in these outdoor gardens. They’ll cause nasturtiums to grow many leaves but few flowers. Use fertilizers sparingly in indoor gardens.

4. Violet (Viola Odorata)

Care for a side of flower with your afternoon tea? These perky, sweet tasting perennials can be eaten fresh or candied and come in at number 4 on our edible flowers list.  Blooming from April to May, violets prosper in moist, well-drained soil in sunny to partly shady locales. Despite the name, violets are available in a wide variety of colors.

3. Anise Hyssop (Agastache Foeniculum)

Put away the twizzlers and go au naturel with this tasty treat coming in the middle of our edible flowers list. The lovely purple blossoms of anise hyssop taste sweetly of licorice and–as the name suggests – anise. Self-seeding, this perennial will come back year after year in your container garden. The anise hyssop prefers well drained soil and sunny locations with some shade.  Flowers appear in July and continue blooming until the first frost of the season.

2. Pansy (Viola x Wittrockiana)

Coffee breath preventing you from getting to close to anyone? Skip the Tic-Tacs and give a pansy a try. These delicate annuals have a wintergreen flavor when eaten whole. Short in stature, pansies can be great choice for an elevated garden.  Pansies blossom from May to July. They should be planted in rich soil in cooler locales. Cooler weather = cool, minty breath.

1. Bee Balm (Monarda Didyma)

This spunky bloom ranks #1 on our edible flowers list because it’s beautiful and tasty, and it might also bring a little wildlife to your container garden. This cheerful plant comes in a variety of colors and has been known to attract hummingbirds, butterflies and–as the name suggests–bees. Given the great bee and butterfly decline, planting bee balm is the least we can do to keep the species alive. And with a delightful citrus and minty taste, bee balm can also be used in salads and made into tea. Bee balm does well in a container garden, and prefers a well lit, sunny spot with rich soil. Blooms appear in July and August.

Any suggestions for our edible flowers list? We’d love to hear from you so please post your favorite bloom to snack on below.

Companion Planting ideas and benefits

companion gardening

Companion Planting Ideas and Benefits:

Life is better in good company. The plant world in no different. Companion planting pairs two or more plants together to promote their growth and survival. Plants simply help each other by providing one another with various benefits. Some plants repel pests, attract beneficial pollinating insects, or provide shade for shade loving plants.

companion planting ideas

Strong Scents Repel Garden Pests

Humans aren’t the only ones bothered by odors. Insects will also avoid eating in an area where an unpleasant smell is present. A lot of very popular anti inflammatory herbs are very aromatic to people but have the opposite effect on pests. For instance, basil and marigolds can be planted around tomato plants to deter the tomato hornworm, which dislikes the scent of both plants. A strong smelling plant can also be used to mask the scent of another plant. Planting onions and leeks around carrots will mask their scent and prevent carrot root flies from finding them. Herbs in the mint family are also a great choice for companion planting.

Sacrificial Garden Distractions

Insects can be tricked from eating your prized vegetables by providing them with other plants to eat. For instance, while cucumber beetles will feast upon cucumbers and squashes, they would much rather eat radishes. Planting radishes throughout your cucumber and squash beds can prevent your cucumbers and squash from becoming a prime target for these beetles. Similarly, planting collards around cabbage will help lure the diamond back moth.

Beneficial Bugs Can Help

While many gardeners associate insects with damage to their plants, there are many insects which are beneficial to have around. Planters full of brightly colored flowers will help to attract bees and ladybugs to your container garden. Cosmos, lavender and echinacea are all excellent companion planting choices. Companion planting dill around cabbage will help attract a parasitic wasp to your garden and help you get rid of cabbage-worms and caterpillars.

Plant Variety Helps Too

Planting a large quantity of a single plant in one location increases the chance that garden pests will find your plants. Companion planting a variety of plants in your container garden will make your plants harder for insects to identify and attack. In addition, a container garden full of different plants also provides a rainbow of color, texture, and aromas to your patio or balcony garden hideaway.

Companion Planting Symbiosis

Properly paired plants can create a more welcoming habitat. Parasitic nematodes can be a problem for gardeners as they attack plants and spread disease. French and African marigolds can be companion planted in garden beds with past nematode problems because they emit a substance from their roots that causes nematodes to leave the area. Tall sun loving plants can also provide habitat for low growing, shade loving plants, such as planting peas and beans alongside spinach.

Bad Companions

Not all companion planting pairs are created equal. Some plants, such as pole beans and beets, can inhibit the growth of other plants when planted near one another. Dill attracts tomato hornworm and should be planted far from tomatoes.

There are lots of proven companion planting options. Research a few new companion plants for your next container garden and see the difference for yourself! Your urban garden oasis is sure to benefit from a little planning.

Herbs-companion-planting
Vegetable-companion-planting

Download Companion Planting Guide Here

Best Balcony Plants for your Garden Oasis

best balcony plants

Best Balcony Plants For Your Garden Oasis:

Balconies are a great opportunity to let your creativity blossom. A little prep will go a long way in selecting the best balcony plants for your garden oasis. From flowers, herbs, and vegetables, to fruits trees, balconies offer plenty of gardening potential.

Best balcony plants in planters.
No two balconies are exactly alike so get to know your space before running out to the garden store. Spend a day making notes about where the light hits, how long it stays, and any periods of shade. Note the direction that your balcony faces. These observations will help you pick the best balcony plants and planters that will work best for you.

Vegetables & Herbs

A proper amount of sunlight is essential for plants to thrive. Tomatoes and peppers are sun lovers so you’ll need to raise them above the railing to ensure they get enough light. This can easily be accomplished with an elevated garden or a vertical garden planter. Lettuce, spinach, and kale can handle more shade and are best grown below.

Herbs are very adaptable and are generally considered best balcony plants. Consider growing anti inflammatory herbs for great health benefits. Having fresh herbs at your fingertips will also add a lot of flavor to your meals. Your foodie friends will admire you for it.

Flowers

There is an endless variety of flowers for use on balconies. Aromatic flowers like lavender can be chosen for their scent. Echinacea can be used to attract beneficial bugs. Be sure to consider sunlight in your selection to ensure bountiful blooms. There is also a variety of edible flowers you can choose from.

Fruit

Most fruit plants require 6-7 hours of sunlight per day. If your balcony can meet these needs, you’ll be rewarded with a delicious harvest each year. Focus on small dwarf varieties of fruit trees and bushes. Strawberries can be grown in space saving hanging planters. Blueberry bushes also look great growing in large container gardens.

Wildlife

Fruits and vegetables must be pollinated to produce. Companion planting them with flowers like Black-eyed Susan helps to get pollinators, like bees and butterflies, to notice your fifth story balcony garden. Alternatively you can pollinate your plants yourself using a q-tip but I would not recommend it.

Shade

A sunny balcony can get really hot in the summer. Shade producing plants can help keep the area cool and improve growing conditions of other plants. Tall flowering plants like hollyhocks and bamboo offer lots of shade. Trellised vines or vegetables such as peas and beans can diffuse the sunlight.

Privacy

Some balconies can feel exposed. Effective use of plants can create privacy. Plants that vine upwards like ivy, honeysuckle and climbing hydrangea can be trellised to provide a divider. Sunflowers are perfect on a sunny balcony. They can grow over five feet high to provide a cheerful fence line. Consider using a mobile container garden to create a moving divider for added privacy.

Best Balcony Plants and Planters

Selecting best balcony plants for your balcony is essential. Using proper planters is equally important. I developed Garden365 Container Gardens to meet specific needs of urban gardeners and plants alike. Choosing a combination of elevated, mobile, and vertical planters will help to ensure everyone’s needs are met.

When it comes to balcony gardens a little creativity, forethought, and experimentation can yield beautiful results! Selection of best balcony plants can be a fun and rewarding experience so go out there and have a blast. A beautiful balcony garden is a wonderful place to unwind. Don’t be surprised when it becomes your favorite “room”. Please let me know how it works out or share your ideas with other gardeners.

Written by: Tom Korzen
Garden365 | Founder

Best Air Cleaning Plants

best air cleaning plants

Best Air Cleaning Plants:

As children we are all taught to be thankful for the trees that provide us with clean air to breathe. However it is easy to overlook the multitude of other plants. These big and small plants also provide us with a livable home environment.

Air Quality Research

The United States National Aeronautics and Space Administration (NASA) performed a two year study to determine the effect of indoor plants on air quality. Their study focused on the removal of common household chemicals. These chemicals include, formaldehyde, trichloroethylene, benzene, and carbon monoxide. NASA discovered that, having houseplants present in a home can actually improve the air quality. They do this by removing common household chemicals from the air. These are most commonly known as the air cleaning plants.

Chemicals in the Home

Chemicals can be found in surprising products in the home. Formaldehyde is present in foam insulation, in many consumer paper products such as facial tissues and grocery bags. It is also present in stiffeners, fire retardants and adhesives.  TCE can be found in printing inks, varnishes, adhesives and lacquers. While benzene is present in gasoline, inks, oils, paints and plastics. Over time these chemicals can off gas into the air of a home.

Some plants are more effective at pulling certain chemicals out of indoor air than others. For instance English ivy, gerbera daisy and Mother-in-Law’s tongue are most effective at removing benzene from the air. On the other hand peace lily and bamboo palm are effective at removing TCE.  Golden pathos and green spider plant are good for removing formaldehyde from the air.

Recommended indoor air cleaning plants for improved air quality:

  • Bamboo or Reed Palm (Chamaedorea seifrizii)
  • Chinese Evergreen (Aglaonema modestum)
  • Elephant Ear Philodendron (Philodendron domesticum)
  • English Ivy (Hedera helix)
  • Gerbera Daisy (Gerbera jamesonii)
  • Golden Pathos (Epipiremnum aureum)
  • Heartleaf Philodendrum (Philodendrum scandens)
  • Janet Craig (Dracaena “Janet Craig”)
  • Marginata (Dracaena marginata)
  • Mass Cane/ Corn Plant (Dracaena massageana)
  • Mother-in-Law’s Tongue (Sansevieria laurentii)
  • Pot mum (Chrysantheium morifolium)
  • Peace Lily (Spathiphyllum)
  • Selloum Philodendrum (Philodendrum selloum)
  • Snake Plant (Sansevieria trifasciata)
  • Spider Plant (Chlorophytum comosum)
  • Wareneckii (Draceana “Wareneckii”)
  • Weeping Fig (Ficus benjamina)
Air cleaning plants

Try these air cleaning plants at home!

Most of these air cleaning plants can be found at your local nursery. These can be placed in a sunny room. They can also be incorporated into an existing window garden. According to NASA, the average home (a space under 2000 square feet) would benefit from having a sampling of fifteen air quality plants to support good air quality. They recommend planting them in pots 6 inches or larger.

Peruse the air cleaning plants list. Consider placing a few of these tried and true house plants in your home. Your health and well being can benefit from the improved air quality (and the ambience!)

Over Watering Plants

over watering plants

Over Watering Plants:

Container gardens offer a fantastic advantage when it comes to meeting the water needs of plants. Unlike a traditional garden, where watering must be done more generally on a large scale, a container garden creates a microclimate where water and drainage needs can be met individually.This avoids over watering plants.

Individual Needs

Every plant has its own unique water needs and rate of use. Check seeds packets and garden books for information on water requirements. Then plant each container garden according to the water usage of the plants it will hold. This way you can ensure that one plant won’t be getting root rot while another goes thirsty!Thus dodge over watering plants.

More Than Meets the Eye

Just because the top of the soil looks dry doesn’t mean it is dry all the way through. If in doubt, stick a finger an inch and a half into the soil and check for wetness. If the soil feels damp your plant won’t need additional watering for now, if it’s dry, go ahead and water as usual. This is a great way to tackle over watering plants.

Don’t Let the Soil Dry Out

Be aware that soilless potting mixes are difficult to manage if allowed to dry out too much. The soil will shrink in on itself and compact, making it difficult to re-wet. If this does happen, take your container and submerge it in water. Keep the pot under water until you stop seeing bubbles emerge from the soil. If your container is too large to stick into a bucket of water, poke holes into the soil and then try watering.

Keep it Coming!

Even though container gardens may seem like they should require very little water, it is important that you water thoroughly. This means that each time you water you should see some water coming out of the holes in the bottom of the container. This helps to provide roots, which have grown towards the bottom of the container, with enough water to help the plant grow and flourish. It will also help prevent shallow roots from forming along the surface of the soil.

Drainage

Proper drainage is essential for a healthy container garden. When water gets trapped in the soil it results in root rot, which will eventually kill your plants. The key to proper drainage is having drainage holes in the bottom of your container garden. Many container gardens today are equipped with drainage holes or spigots that move the water out and away from the garden. If you’re concerned about the drainage rate, consider adding additional drainage holes to your container.

The Rock Debate

For many years garden professionals have suggested placing a layer of crushed gravel in the bottom of a planter to encourage drainage. Recently these same garden pros have been suggesting that this practice be abandoned. Why? Although it might seem logical that the water would drain more quickly through the larger spaces between the rocks than through the small particles of soil, the water is actually getting trapped in between the two layers and pooling there. This can lead to the same issues seen in overwatering.

Here is how over watering plants will look:

over watering plants

Happy Plants and Healthy Gardens without over watering plants

With a little forethought, container gardens can be successfully planned to encourage efficient water use, create specialized microclimates and provide for healthy plant and root growth. Make the time to plan out your next container garden, or redesign an old one. You won’t regret it!

how to grow herbs indoors

growing herbs inside

How to Grow Herbs Indoors?

Fragrant and full of taste, herbs are a favorite of gardeners and cooks alike. And you can learn how to grow herbs indoors if you’re new to planting or gardening. It’s super easy! The other beauty of growing herbs indoors is that you can grow them in the dead of winter as long as you have a window or even just a grow light.

how to grow herbs indoor choosing herbs

Choosing Herbs

Before you start growing herbs indoors, get to know the light, soil and water requirements of each of your favorite herbs. While it’s easy growing herbs indoors that flourish, certain herbs such as fennel and horseradish don’t. These herbs require deeper root systems than most containers allow. But luckily many delicious culinary herbs like chives, parsley, basil and rosemary grow happily inside.

how to grow herbs indoor light

Light

Herbs are light-loving plants that require six hours of sunshine each day. Indoor herbs should be placed in a sunny windowsill or near a south-facing window if available. If not, consider supplemental lighting with a grow light. These only cost a couple of dollars at Home Depot, and will make growing herbs indoors in places like basements and attics possible.

How to grow herbs indoors that once lived outside

When moving herbs grown outdoors into your home, be sure to give the herbs time to adapt to less sun-drenched conditions. This can be done by moving plants from full sun into a shadier spot each week. Rosemary is especially sensitive to changes in light conditions because it’s slow-growing and does not acclimate quickly enough to indoor conditions.

how to grow herbs indoor that once lived outside soil and water

Soil and Water

Place herbs in soil that has good drainage. A sterile, soilless mixture containing perlite provides proper drainage, while also limiting the chance of disease and pest problems.

Herbs should be watered when the soil feels dry to the touch. But never let the soil dry out completely. You should see water coming out of the bottom of the pot when you water–this ensures that the pot has not become clogged. Place your pots in a plastic, leak-proof container before watering. And if you’re growing basil, water it at the base. It doesn’t like getting its leaves wet.

How to grow herbs indoors that really flourish:

To maintain the health and vigor of your plants, you can use fertilizers about once every two weeks. Use more than this and your herbs may start tasting like fertilizer–not a flavour you want in your soup!

Want to give your herbs an extra boost? While you’re popping your own multivitamin, why not show your herbs the same courtesy? Liquid seaweed is packed with B1 vitamins, which help the plants grow and produce necessary oils.

Bugs

A common misconception when people learn how to grow herbs indoors is that they think the herbs are immune to pests. Indoor herbs can be prone to attacks by whiteflies, aphids, spider mites, scale insects and mealy bugs. But don’t despair! It’s much easier to eliminate bug problems in small indoor planters.

Remove bugs by placing the plants under a strong stream of water. You can even use insecticidal soap and still maintain organic standards. Follow the directions on the bottle, and use repeated applications until the problem is eliminated.

You now know the basics on how to grow herbs indoors, so why not give it a try? The mini elevated garden works perfectly for herbs. Just remember that no matter how you’re potting them, make sure you place them near a window. They’ll thank you, and so will your taste buds. Happy planting!

Square Foot Garden Plan

Square Foot Garden Plan:

What gardener could resist the opportunity to provide organic produce for family and friends out of their own backyard garden? It’s easy to feel limited by space, resources and time when creating a garden, especially in more restricted urban gardening settings. Luckily productivity doesn’t require an acre of land or tons of time!

More than thirty years ago Mel Bartholomew developed a system of gardening that makes the most of space, resources and time. Known as Square Foot Gardening, this technique revolutionized the way that gardeners in all locales can produce their food.

Plant And Harvest More Plants with a square foot garden plan

Square Foot Gardening works on the principle that each square foot of a garden can be planted to maximize the output of soil, water and seeds. According to Bartholomew, Square Foot Gardening requires 50% of the cost, 20% of the space, 10% of the water, 5% of the seeds and 2% of the work required by traditional row gardening.

According to Bartholomew, one 4′ x 4′ Square Foot Garden box can provide enough produce for one individual to have a salad every day of the growing season! A second 4′ x 4′ Square Foot Garden box would provide enough supper vegetables for that same person every night of the growing season.

Garden Location

Square Foot Garden plans should be located in areas that get 6-8 hours of sunshine each day, and that do not puddle after rains, or receive heavy shade from nearby trees. The type of soil in the area does not matter because you will be creating your own soil mix to add to the garden.

Setting Up

For a standard square foot garden plan there is a 4×4 wooden square, however smaller 2×2 and 3×3 squares can also be used effectively in locations with limited space. While it is easiest to build a square foot garden that meets these measurements, pre-made container gardens can also function efficiently if measured out into square feet. Square Foot Gardens should be at least 6 inches deep.

The key to an efficient Square Foot Garden Plan is to measure out and then secure a permanent grid on the top edge of the garden. The grid can be created from wood strips, or a more frugal trick is to use venetian blinds. Once created, the grid will make it easy to locate each square foot of garden space to allow for efficient planting.

Soil

A square foot garden plan discourages the use of native soil and instead suggests creating your own soil mix according to Mel Bartholomew’s recipe. His soil mix requires 1/3 blended compost, 1/3 vermiculite, and 1/3 peat moss. According to this recipe the compost should be a blend of at least 5 types of compost. Compost can be purchased from garden stores, or created from your grass clippings, excess veggies, garden clippings, egg shells, etc.

Planting Guide

For a square foot garden plan, small plants such as carrots or radishes should be planted 16 plants to a square foot. Medium plants such as spinach and bush beans should be planted 9 plants to a square foot. Larger plants such as leaf lettuce should be planted four plants to a square foot, while cabbages and broccoli should be planted one plant to a square foot. Plants should be watered by hand.

Square Foot Garden Plan
Types of crops which can be grown in a square foot garden plan